InteliNote Walkthrough |
  
|
InteliNote Walkthrough |
|
1.Let’s login and then go to Sample Office.
2.Click Tools then InteliNote
a.This is only one way to access InteliNote, if you want to you can also access it via the Documentation button on the Patient Screen or you can access it also when doing an Audit Prep.
b.If you are wondering about InteliNote without Audit Prep being involved, skip to step # 4.
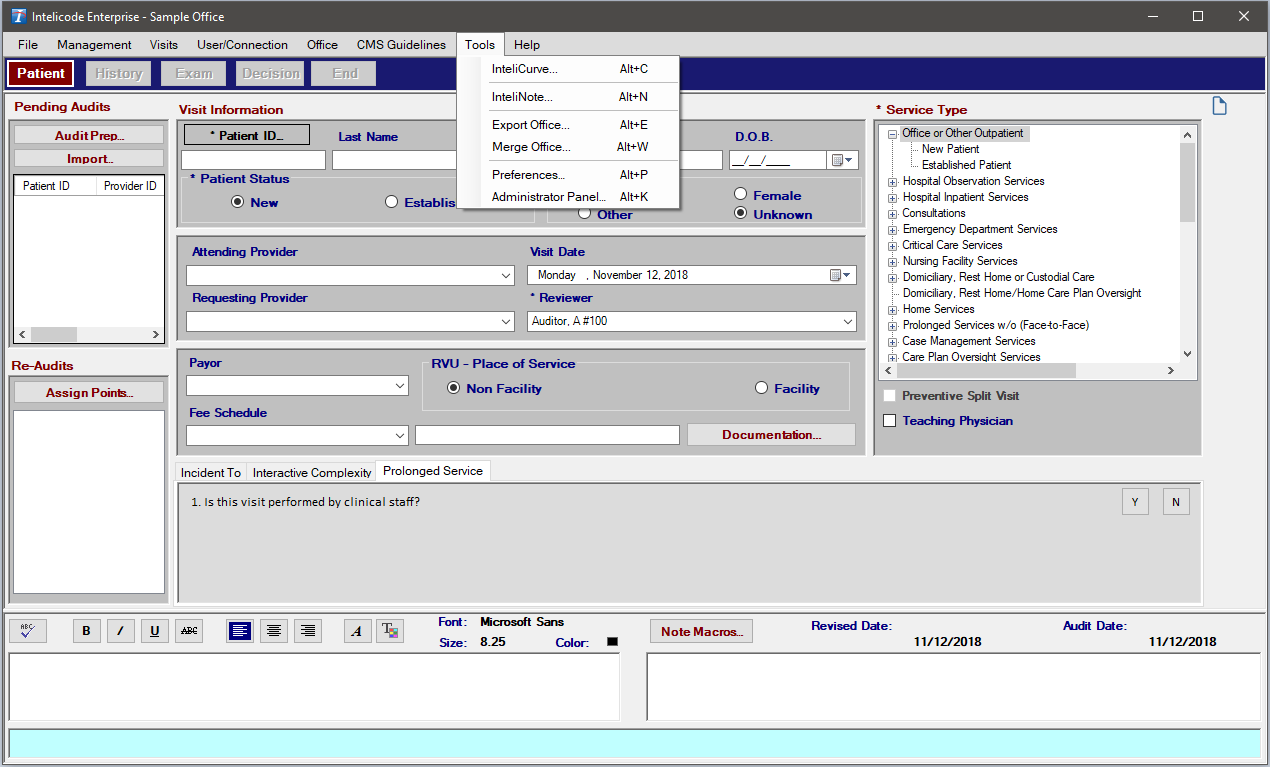
3.Click Audit Prep and then put in the information you would like (for more regarding Audit Prep see the Audit Prep section in the Patient Screen under Navigation). Once you are ready to assign a document or image click the Documentation button. This will open the InteliNote for you to use
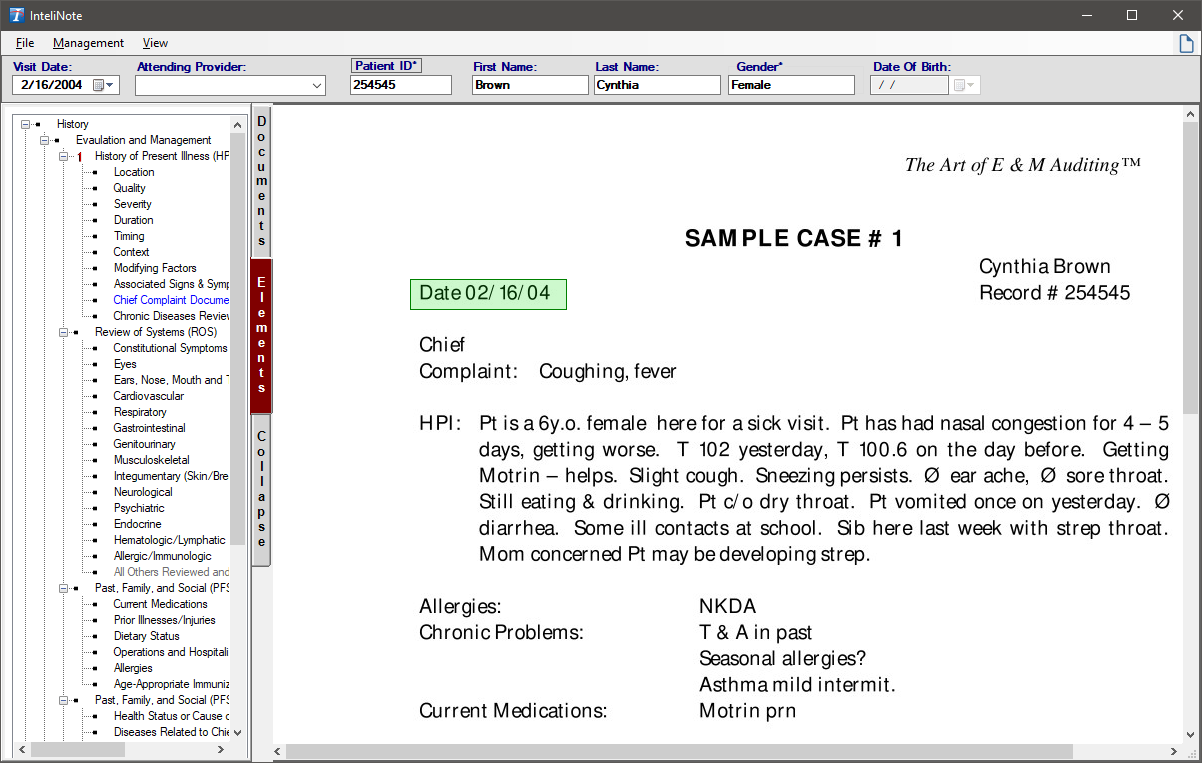
4.Once InteliNote is open, you can either click Browse to open a window that will allow you to open an Image or Document in InteliNote. You can also drag and drop an Image or Document in the InteliNote at any time to add it to a list you can add elements to.
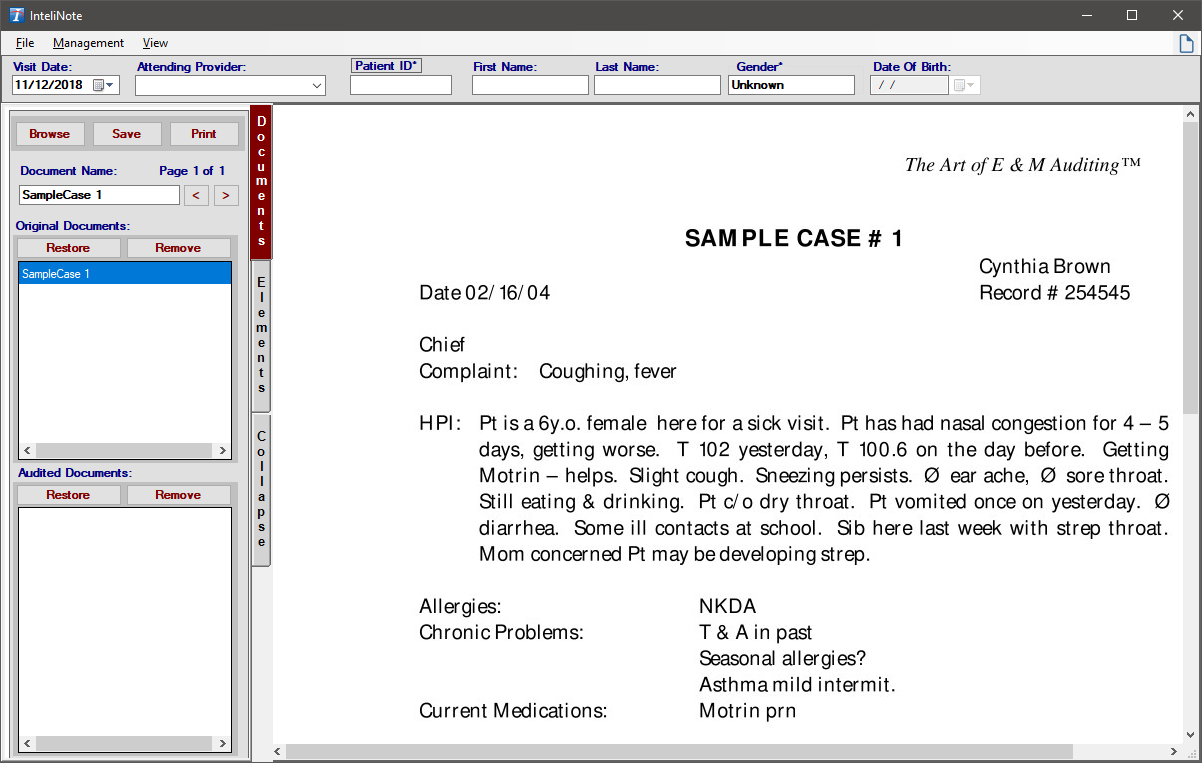
5.Once you have a document or image loaded into InteliNote in the Original Documents list, you can select it to add elements to it. You can do this by a single-left click on the image or document.
6.The name of the image or document is the name you originally gave it, to change this, you would type in a different name and then click Save.
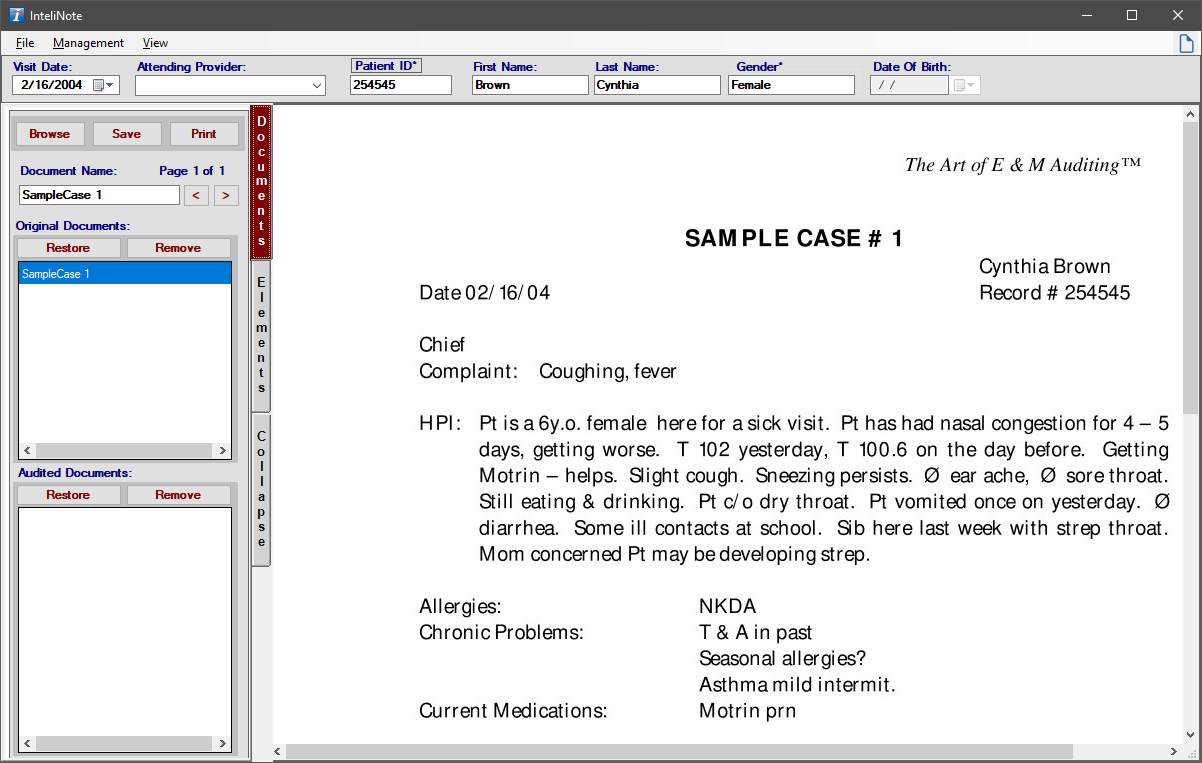
7.You can set the Visit Date, Attending Provider, and Patient ID. If a patient already exists it will load in the First & Last Name, the Gender, and DOB. If the patient does not exist, you can put it in on the Patient Screen like normal or you can create the patient in the Patient Management Screen prior to opening InteliNote.
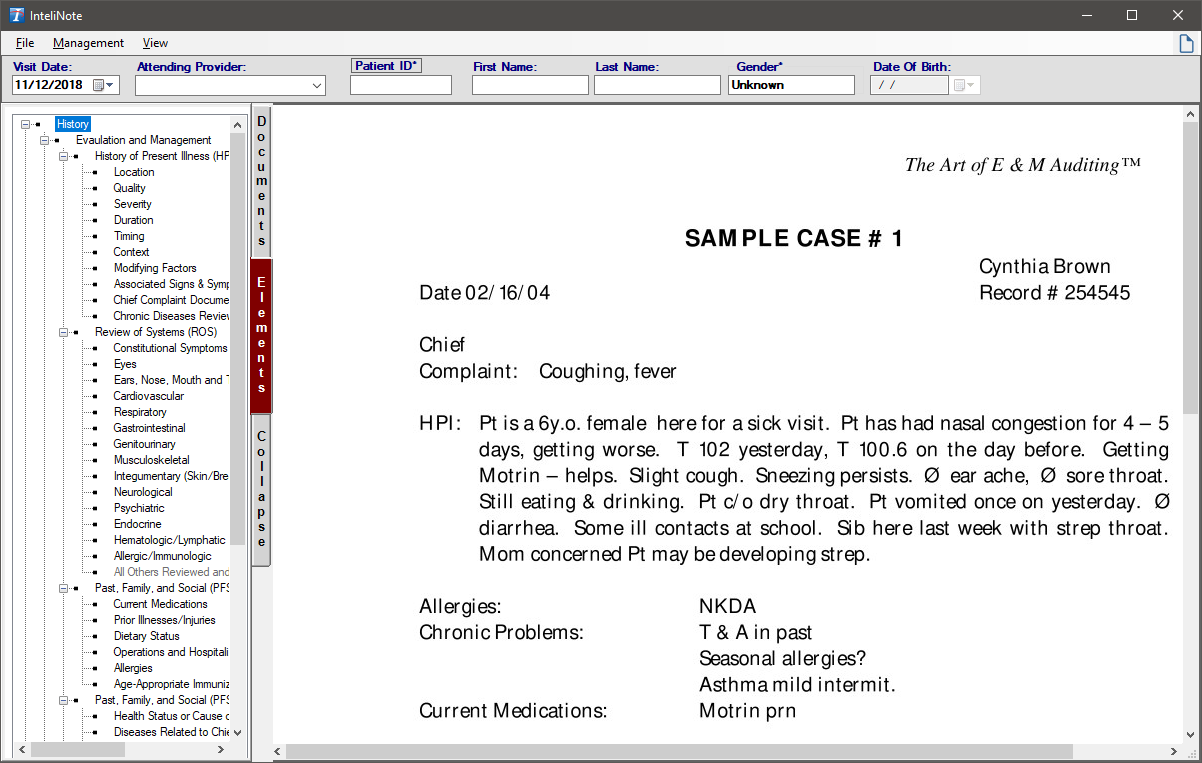
8.To add the elements you would like, click Elements and this will show a new tab that you can add boxes to the document of any element in Intelicode®. This can include: History (Regular, IPPE, and AWV), Exam, Decision, and Note Macros.
a.The elements are in a tree view and so you would click the ‘+’ symbol next to the section you wish access to. Then continue to click the ‘+’ symbol until you get to the element you wish to add.
9.After you select the element you wish to add you can move your mouse over to the image or document. You will notice that it becomes a pen. This means that you can draw a box now, if it shows a circle with a slash in the middle that means that you cannot draw a box with the element you selected.
10. You would single-left click the starting place for your box then hold your mouse button and drag to where you want to end the box and let go of the mouse button. Now the box has been drawn. This box can be moved around, expanded in size, or shortened in size at any time.
a.No boxes can overlap each other. If any box is overlapping then Intelicode will prompt you that no boxes can be overlapping. InteliNote will also put the box back to its last shape and size before it was in the overlapping state.
b.To move a box you will see a cursor with four arrows, each one pointing in a different direction. This tells you that you can move the box.
c.To resize the box, move your mouse to the lower right corner to get cursor that has two arrows pointing away from each other. This will allow you to resize it to the right and down. You can move your mouse to the top left corner to resize it to the left and up.
11. Once you have added an element, the Original Document will be in the Audited Document list with the element you selected. The Original Document stays there so you can reuse the document without elements at any time.
a.You can remove any document or image from the Original Documents list by clicking the Remove button in the Original Documents sections. Restore will allow you to add any Original Document you have removed by clicking on the document or image in the box it brings up and then clicking Ok.
b.The same described above can be done to the Audited Documents at any time as well. Remove will remove an Audited Document from the list and Restore will allow you to put an Audited Document back into that list.
12. You can collapse the menu on the left by clicking on the Collapse button under the Documents and Elements buttons. This will allow you to see the image or document without the menu compressing the image.
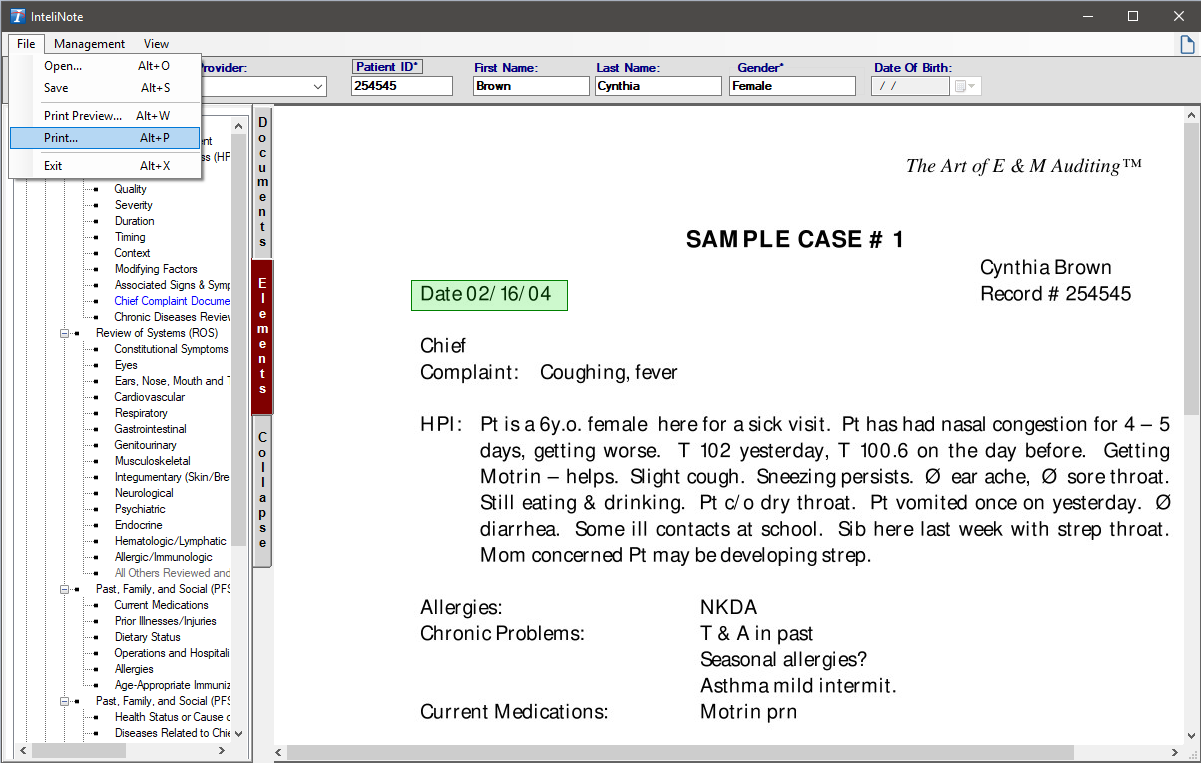
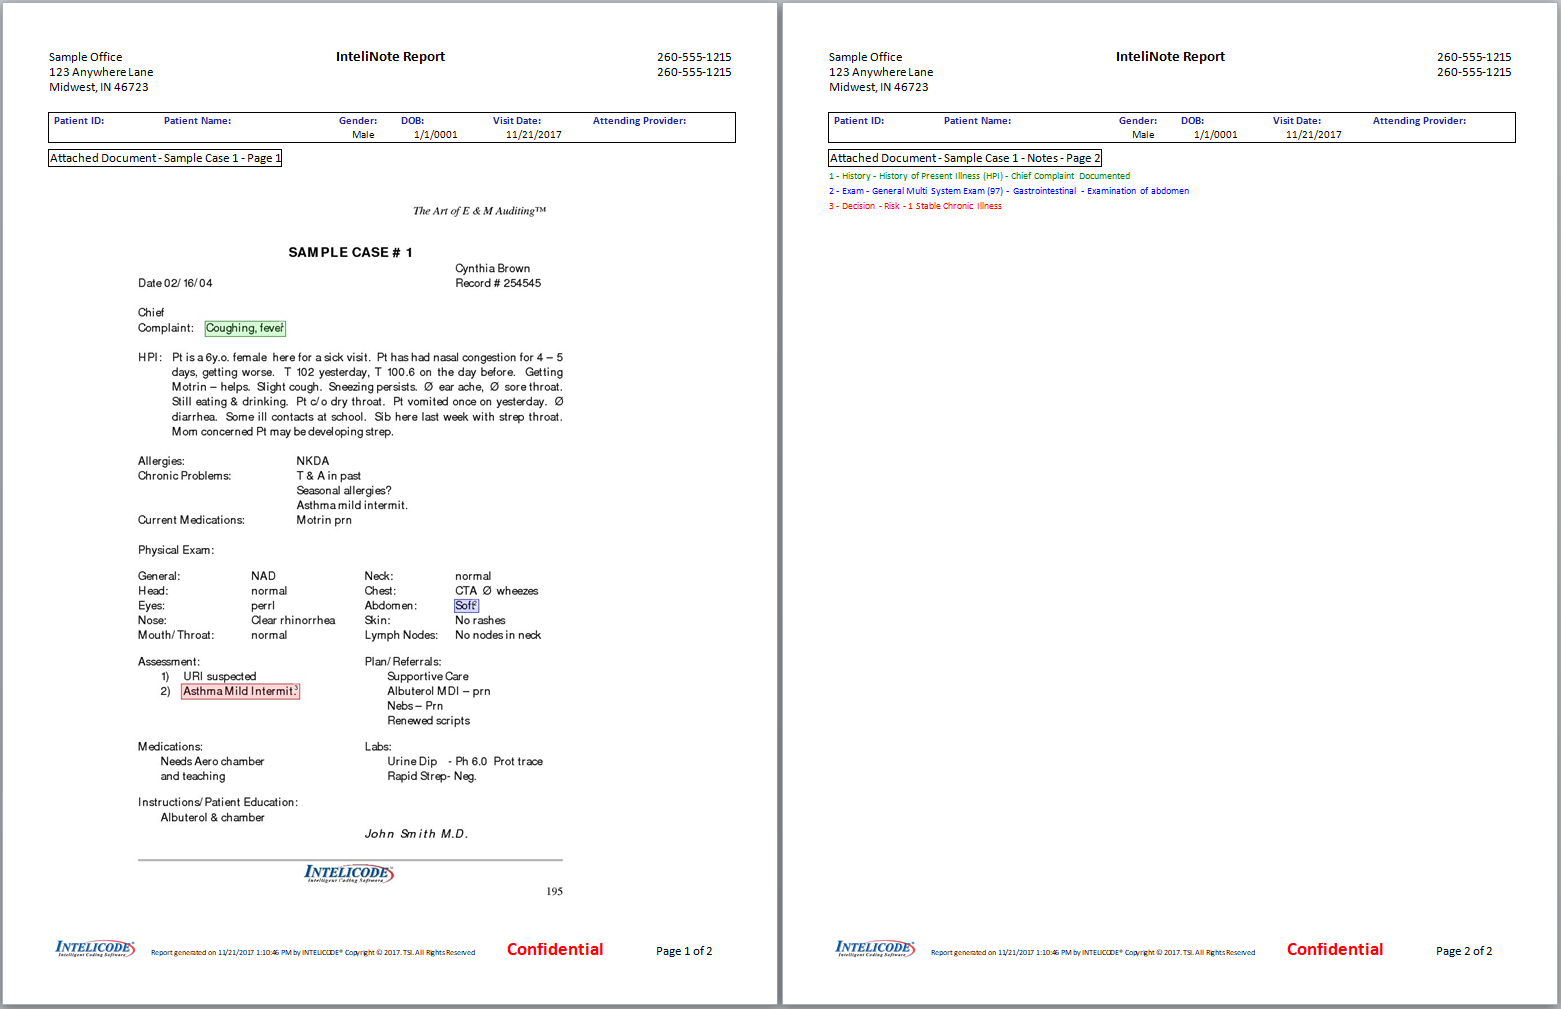
13. You can print from the InteliNote by clicking Print and this will only print the image along with any elements selected. You can also print an Encounter Detail Report of the visit once you are finished with the visit or audit. This will print the visit and the attached image or document, along with elements, automatically for you. Finally you can print an Audit Summary with the image(s) or document(s) by selecting the Show Attached Documentation option under Report Options. This will show all visits along with any image or document attached to those visits along with the elements selected. The image or document will show under the visit it corresponds to.
Copyright © 1998-2026 Technology Solutions, Inc. All rights reserved.
INTELICODE® is a registered trademark of Technology Solutions, Inc. (TSI). All Rights Reserved.