Install with SQL Server |
  
|
Install with SQL Server |
|
To install INTELICODE® for use with Microsoft SQL Server, you will need to:
1.Download Intelicode®.
2.Have an installed copy of Microsoft SQL Server 2016 or newer (2022 or newer recommended), any edition (Express through Enterprise, not included).
3.If you need to install Microsoft SQL Server, you can find a manual here: intelicode.com/support. There you can find the links for the programs necessary and have a step-by-step walkthrough as well. If you do not already have a SQL Server instance you can download a free copy of our Express automated installer that will install and configure SQL Server Express automatically. You can get that download from here: Automated SQL Installer
4.Get Microsoft SQL Server installed on your local machine or network server. Databases will need to be created named "Office" and named "Provided" (suggested names, they can be different if needed).
5.Configure your user access and permissions to those databases for the users that will access them. User permission configuration will be required for usage, "db_owner" is recommended for updates. If you are on an Active Directory domain it is recommended to create an AD group to simplify maintenance.
6.Install Intelicode® on a machine that will have access to the SQL Server.
7.Start Intelicode® and then at the Login dialog click on the Options menu. If this is your first time launching Intelicode you will be prompted for Connection Settings immediately and can skip this step.
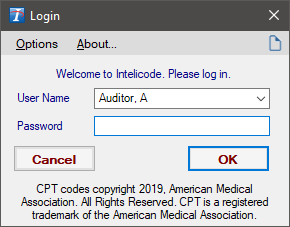
8. Select Connection Settings from the menu.
9. Enter the appropriate information for your SQL Server.
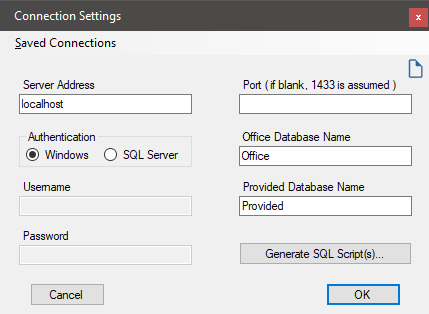
10. Enter the Server Address (hostname or IP Address) of your SQL Server and the Port if you have changed it from the default of 1433 (it is common for the Express version to assign a different dynamic port). If default, it may be left blank.
11. Select the type of SQL Server Authentication. If "SQL Server Authentication" is used, you must enter the Username and Password for the SQL Server user account.
12. In the Office Database Name box enter the name of the Office database you created on the SQL Server. For simplicity, "Office" is recommended.
13. In the Provided Database Name, enter the name of the "Provided" database from the SQL Server.
14. To populate the databases with the necessary data, you will then click the Generate SQL Script(s) button. This will prompt you to save a script for the "Office" database and "Provided" database. If you ran our Automated Installer for SQL then you can skip this step and the next one.
15. Once you have created the scripts, you will need to copy them to your SQL Server and then execute them against the databases on the server.
16. Click OK when finished and if all of the information entered is correct you will be connected to the database server.
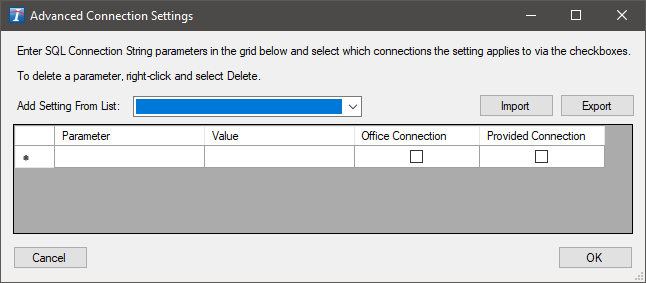
17. Additional connection settings are available under Advanced Connection Settings. These settings should only be changed for special circumstances. Incorrect settings can reduce application stability. Change settings at your own risk.
Copyright © 1998-2026 Technology Solutions, Inc. All rights reserved.
INTELICODE® is a registered trademark of Technology Solutions, Inc. (TSI). All Rights Reserved.