Elements |
  
|
Elements |
|
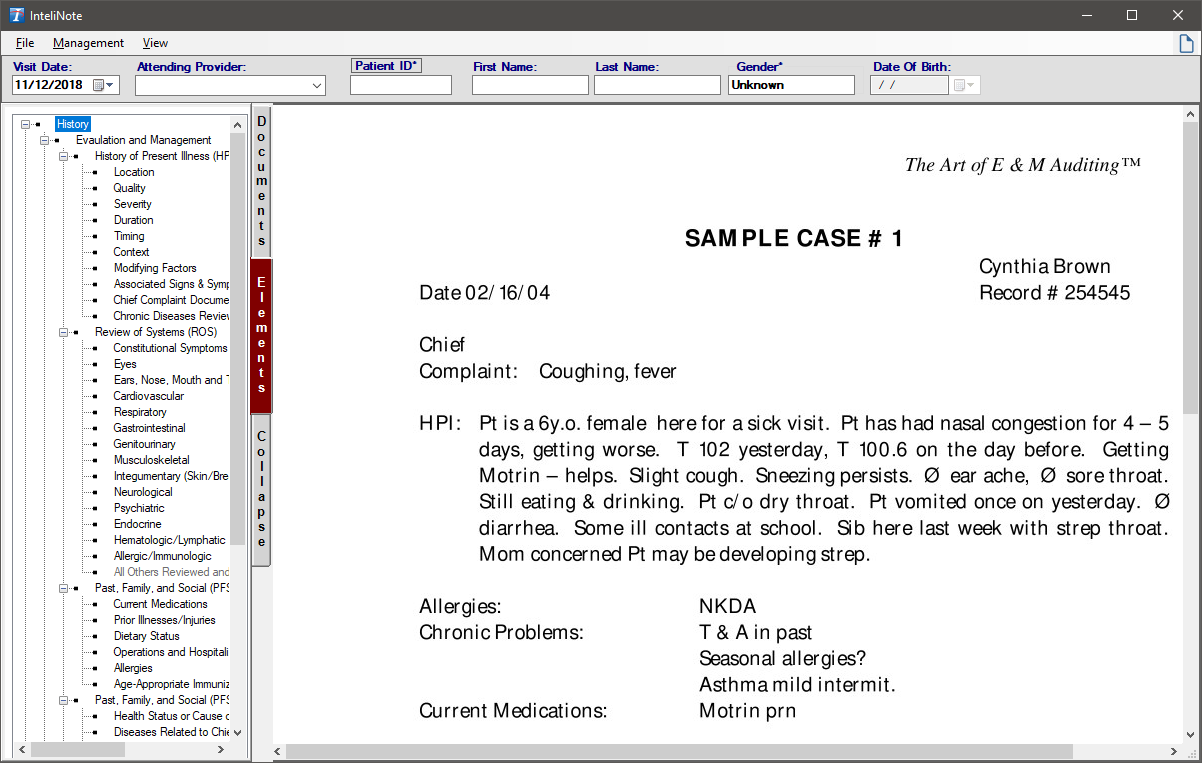
•The elements that you can select are in a tree view. All elements of History, Exam, and Decision are there along with Note Macros. What you would do is select an element by clicking the ‘+’ sign next to where the element resides (eg, History, History of Present Illness (HPI), Location). Once you select the element move the mouse over to the image or document and draw a box over what you like. As you add elements to the image or document it will also check or add those elements in Intelicode.
•Boxes cannot overlap each other in any way. You can resize by moving your mouse to either the top left or the bottom right corners to find the arrow cursor which will allow you to resize it. You can also move it by not having the cursor in one of those corners to where it looks like 4 arrows pointing in different directions. Hold down the mouse button after you click on the box and then move and let go of the button when the box is where you want it.
•You can also change or remove a box at any time. To change, select the element you want to change the box’s element to and then right click on the box and then click Change to the select element. To remove, right click on the box you no longer want to have and then click Remove. This will not only remove it from the image or document, but also Intelicode as well.
•If you are using this in Audit Prep and wish to go back to the Audit Prep screen after you finish with the image or document you attached, just close out of the InteliNote window.
Copyright © 1998-2026 Technology Solutions, Inc. All rights reserved.
INTELICODE® is a registered trademark of Technology Solutions, Inc. (TSI). All Rights Reserved.