Copy and Send Between Offices |
  
|
Copy and Send Between Offices |
|
In Intelicode®, you have the ability to "Copy" or "Send" various items from office to office.
1.Copying and Sending from the Management Screen:
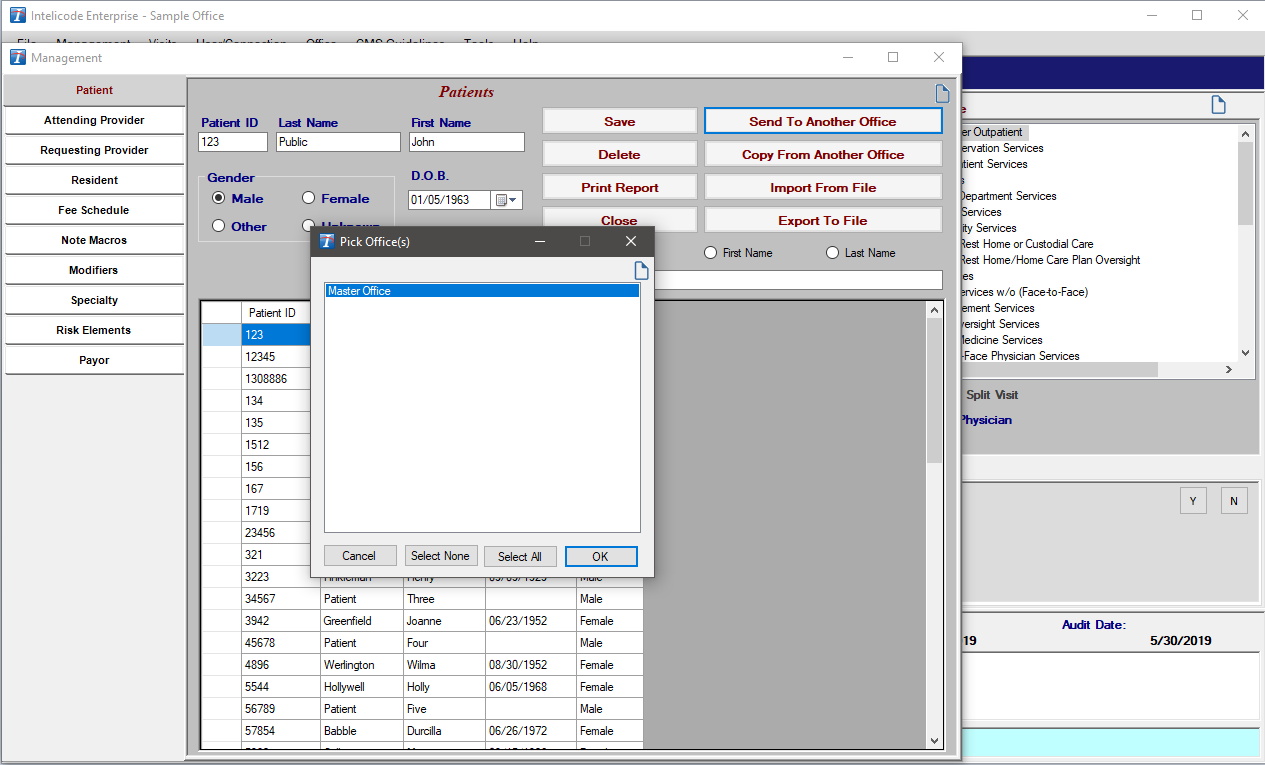
a.Send to Another Office:
i.Select the record(s) that you want to be sent (copied) to the corresponding table in another office(s).
ii.Click the Send to Another Office button. The Pick Office(s) pop-up window will appear.
iii.Select the office(s) that you would like to send this record(s) to.
iv.Click OK to send the record(s). The records remain in this office and are now copied to the corresponding table in the other office(s) selected.
v.If there is a record from the selected office(s) that has the same ID as a record in the data you are sending, you will be asked if you want to overwrite:
✍The All option will tell Intelicode® to overwrite any and all records (from this point forward in this process) that have an ID that matches the ID in the data you are sending.
✍The None option will tell Intelicode® to not overwrite any records for this particular copy from this point forward in this process.
✍The Yes option will tell Intelicode® to overwrite this one particular record and only this record.
✍The No option will tell Intelicode® to not overwrite this one particular record and only this record.
✍The Cancel option will stop the entire Send process.
b.Copy From Another Office:
i.Click the Copy From Another Office button.
ii.Select the office(s) from which you wish to copy all of its records from its corresponding table.
iii.Click OK. The records from the office(s) you selected are now a part of the corresponding table in the current office.
iv.If there is a record from the selected office(s) that has the same ID as a record from your current table, you will be asked if you want to overwrite:
✍The All option will tell Intelicode® to overwrite any and all records that have an ID that matches the ID in the current table.
✍The None option will tell Intelicode® to not overwrite any records for this particular copy.
✍The Yes option will tell Intelicode® to overwrite this one particular record and only this one.
✍The No option will tell Intelicode® to not overwrite this one particular record. If there are any more duplicate records, you will asked the question again pertaining to each of the other records so long as you click No.
✍The Cancel option will stop the entire Copy process.
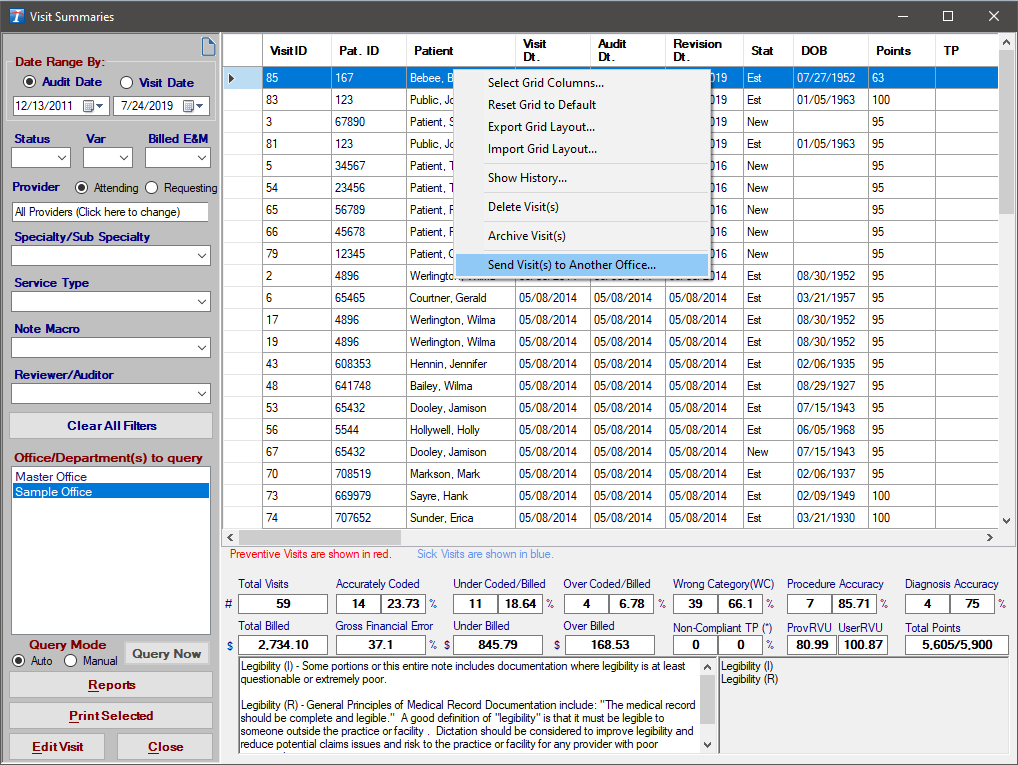
2.Sending Visits from Visit Summaries:
a.Select the visit(s) you wish to send.
b.When you have the visit(s) selected, right-click anywhere in the grid and click Send Visit(s) to Another Office. The Pick Office(s) window appears.
c.Choose the office(s) that you want to send the visits to by clicking on the office name.
d.Duplicate visits will be ignored.
e.Use the Shift key and the Ctrl key to select multiple offices.
Copyright © 1998-2026 Technology Solutions, Inc. All rights reserved.
INTELICODE® is a registered trademark of Technology Solutions, Inc. (TSI). All Rights Reserved.