Customized Visit Grid |
  
|
Customized Visit Grid |
|
1.Click on the Visits menu at the top of the screen.
2.Select the Visit Summaries option by clicking on it.
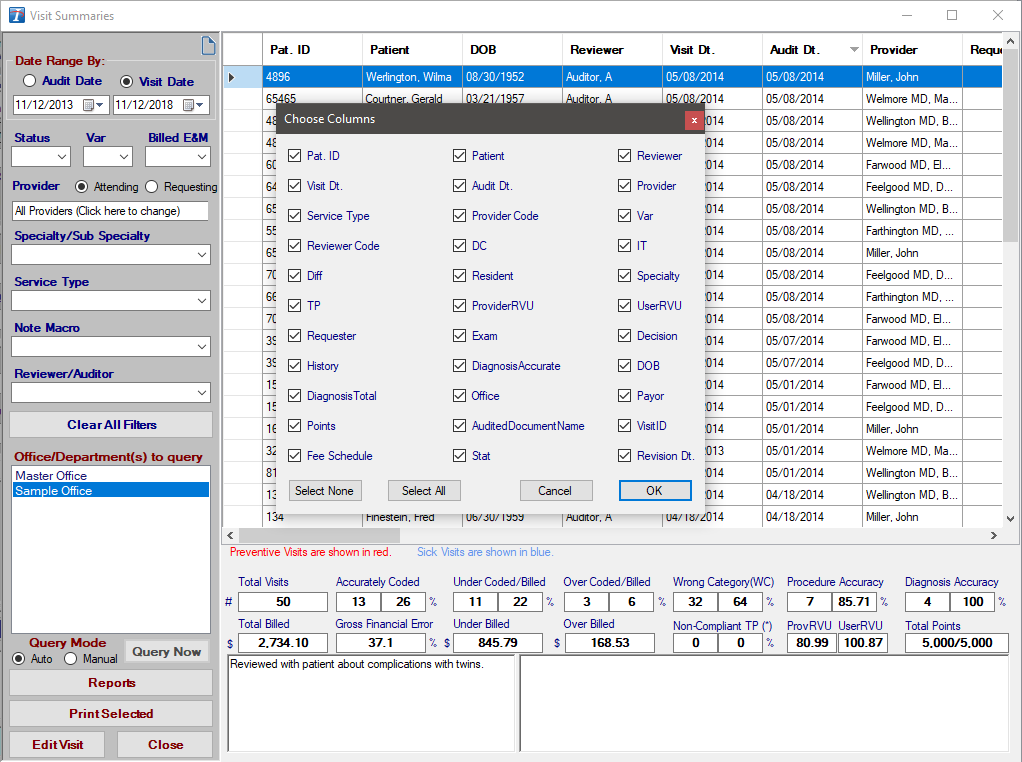
3.To customize which columns are visible in the grid, right-click anywhere in the grid and click on Select Grid Columns. Check on or off the desired columns (fields) by clicking the column name or on its corresponding check box.
4.To customize the order in which the columns display, simply click on one of the column headings at the top of the grid, hold down the mouse button and drag it across to the desired location. Intelicode® will remember your column order even after exiting the program and returning.
5.To sort the data according to the ascending or descending order of the data in a particular column, simply click on that column heading at the top of the grid. Click the column heading again to toggle between ascending or descending order.
6.To alter the width of any given column, use your mouse to put the cursor on the column heading bar on the line that separates the columns, hold down the mouse button, and drag the column divider to the desired position. Intelicode® will remember your column widths even after you have exited the software and returned.
7.To reset your columns to their original settings, right-click on the grid and then click Reset Grid to Default.
8.To filter the data based on a particular field, use the drop down boxes on the left side of the screen. Intelicode will remember your filter settings even after exiting the program and returning. To reset the filters to their original settings, click Clear All Filters.
9.See the Visit Summaries help page for more information.
Copyright © 1998-2026 Technology Solutions, Inc. All rights reserved.
INTELICODE® is a registered trademark of Technology Solutions, Inc. (TSI). All Rights Reserved.