Administration |
  
|
Administration |
|
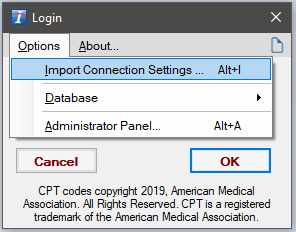
Access the administrative tools by clicking on Options from the Login screen that comes up when you launch the program (or from the Tools menu once you have logged into an office). The Login screen can also be accessed from within the program by clicking on the Change - User Connection option on the User/Connection menu at the top of the screen.
To Import Connection Settings:
1.Click on Import Connection Settings... on the Options menu.
2.Browse to the location that has the "Intelicode Connection File" (.tsicn) that you are looking for.
3.Select the file and click Open.
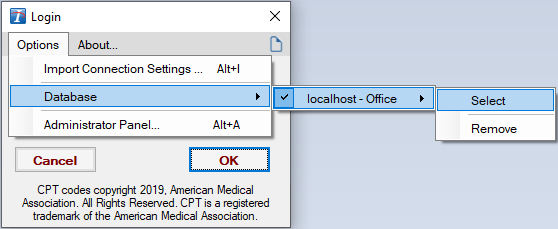
To Select Database Server:
1.Hover over Database Type on the Options menu.
2.Select the appropriate database server. Most users will have only one.
Administrator Panel:
1.Click on Administrator Panel on the Options menu.
2.Enter the administrator password and click OK. The Intelicode Administrator Panel comes up.
3.Settings:
a.Connection Settings:
i.Click on the File menu and choose Connection Settings. The Connection Settings screen comes up.
ii.To set up a SQL Server connection, enter the following information.
iii.Fill in the Server Address, Port, Username, and Password as appropriate.
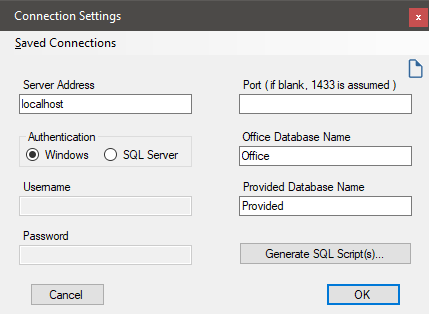
iv.Click OK when you are finished.
b.Save Connection Settings (only available when using SQL Server):
i.Click on the File menu and choose Save Connection Settings.
ii.Browse to the location that you want to save the "Intelicode Connection File" (.tsicn).
iii.Type in a file name.
iv.Click Save to save the file.
c.Load Connection Settings:
i.Click on the File menu and choose Load Connection Settings.
ii.Browse to the location that has the "Intelicode Connection File" (.tsicn) that you are looking for.
iii.Select the file with a (.tsicn) extension and click Open
d.Advanced Connection Settings:
i.Additional connection settings are available under Advanced Connection Settings. These settings should only be changed for special circumstances. Incorrect settings can reduce application stability. Change settings at your own risk.
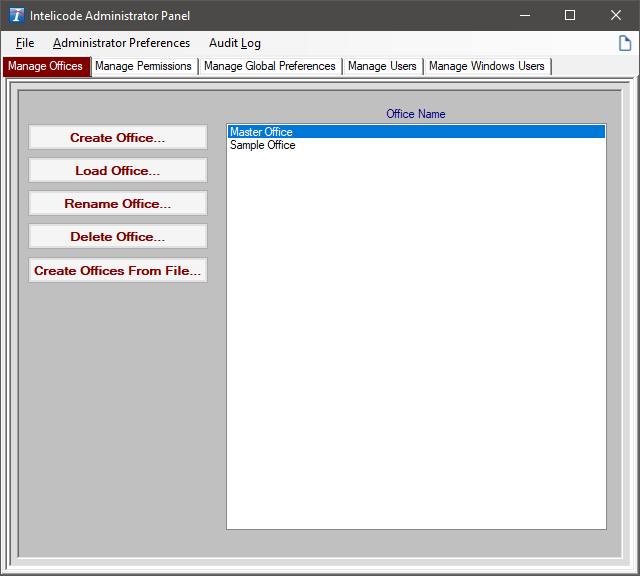
4.Manage Offices:
a.Create Office:
i.Click the Create Office button on the Manage Offices tab. The "Office Management" screen comes up.
ii.Fill in the appropriate information.
iii.Click OK when finished.
b.Load Office:
i.Click the Load Office button on the Manage Offices tab.
ii.Browse to the location that has the "Intelicode Office File" (.tsi) that you are looking for.
iii.Select the file and click Open.
c.Rename Office:
i.Select from the list the office that you wish to rename. (You can also change the address and other information.)
ii.Click the Rename Office button on the Manage Offices tab. The "Office Management" screen appears with the current information filled in.
iii.Change the Office Name or any of the other fields.
iv.Click OK when finished.
d.Delete Office:
i.Select from the list the office that you wish to delete.
ii.Click the Delete Office button on the Manage Offices tab. A "Deleting Office" alert appears.
iii.Click Yes if you indeed wish to delete the office.
e.Create Office(s) from file:
i.Click the Create Offices From File button on the Manage Offices tab.
ii.Browse to the location of the file you wish to import.
iii.Using the drop down box in the lower-right portion of the Open window, choose the file type of the file you wish to import.
iv.Next, select the file by clicking on it.
v.Click the Open button to import the file.
vi.You will be asked the question, "Does this file have headers?" If the top row in your spreadsheet or CSV file is made up of column headings, click Yes. Otherwise, click No.
vii.If you clicked Yes, you will next have the opportunity to match up the fields in your file to the Office table fields. Read the text in the light blue box at the bottom of the Import Fields window for further instructions. Click OK when you are confident that the fields are matched up properly.
viii. If you clicked No, you will need to match the column name to the column in your data. You can do this by right-clicking on a field and matching it up to the number of the order in which it appears in your data. The order begins with "0". Click OK when you are confident that the fields are matched up properly.
ix.Offices will be created or updated with the information in the file.
x.If an office already exists, you will be asked whether you want to update the office. You may click Yes to update this office, All to update all offices, No to skip this office, None to skip all existing offices, or Cancel to stop this process.
xi.If you have questions about creating or updating offices from a file, see the Importing Office Creation Data help page.
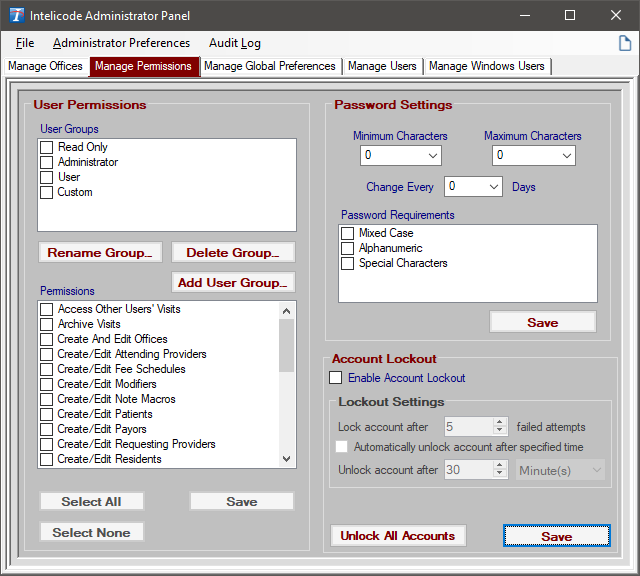
5.Manage Permissions:
a.User Permissions:
i.To create a custom level of permissions, click on Custom and check the appropriate permission settings. You can also click Select All to select all permissions or click Select None to select no permissions.
ii.If you wish to set a User to have a certain User Group outside of Custom, there is also Read Only, Administrator, and User Permission sets.
iii.The permissions associated with these groups cannot be edited and are already designated to the appropriate Group. An example of an un-editable Group is Read Only, this Group has no Permissions associated with it and cannot have any permissions associated to it.
iv.After you have finished making the necessary changes, remember to click the Save button on the left side to save your changes.
v.Custom user groups can be created. They can be assigned any permissions needed and can be assigned per user if desired.
b.Password Settings:
i.To set the number of minimum characters for a user's password, click on the dropdown box just under the Minimum Characters heading and select the desired number.
ii.To set the number of maximum characters for a user's password, click on the dropdown box just under the Maximum Characters heading and select the desired number.
iii.To require the user to change his/her password after a set amount of time, click on the dropdown box after it says Change Every... and select the desired number of days.
iv.To require the user to have at least one uppercase character and at least one lowercase character in his/her password, check Mixed Case.
v.To require the user to have at least one letter and at least one number in his/her password, check Alphanumeric.
vi.To require the user to have at least one "special character" (ie., !@#$%^*) in his/her password, check Special Characters.
vii.Once you have selected the Password Requirement Settings, click the Save button on the right side to save your requirements.
6.Manage Global Preferences:
a.Global Preferences:
i.To change the rate at which the programs checks the server for updated data, enter the desired value. This setting is for multiple users sharing the same data on the same server.
ii.To log the user(s) off after a period of inactivity, enter a value here.
iii.If you wish to have the Intelicode screen lock after an idle period, check the box and enter a timeout period.
iv.The Override large packet size option is used to optimize performance in some situations. The default value of 16 should be used in most cases.
v.If you wish to let users change their own passwords, check this box. The password change option is available from the tools menu on the main Intelicode® screen.
vi.If you wish to require end user(s) to enter an explanation as to why they have edited a visit check the box and the user(s) will be prompted upon saving for a reason.
vii. If you wish to have the Preferences saved Globally on an application server, check the Use the Global Configuration file box, otherwise settings will be saved per user in their user profile.

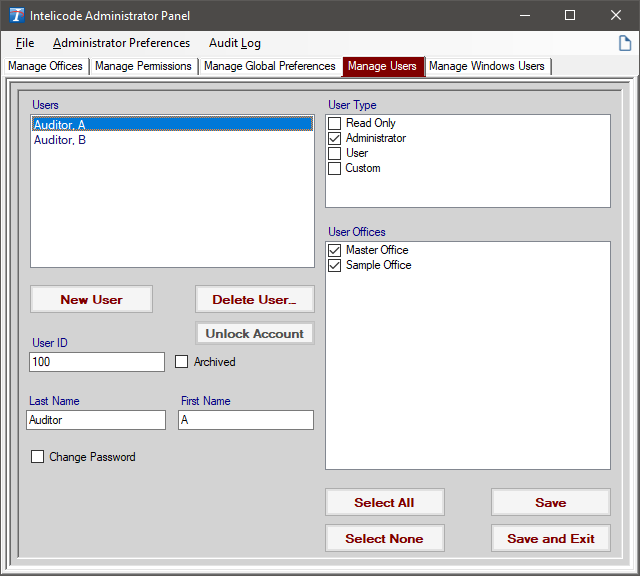
7.Manage Users:
a.Create New User:
i. To create a new user, click on the New User button. The information is now blank. Fill in the appropriate information.
ii. To delete existing users(s), select the user(s) from the Users list that you wish to delete. Click on the Delete User(s) button. Confirm if you indeed wish to delete the user(s).
iii. To alter a user's settings, select the user from the Users list whose settings you wish to alter. Make the necessary changes to the information.
iv. To set or change the user's password, check the Change Password checkbox.
v. To set a user's permission settings, select the user from the Users list, then check the box under the User Type heading that represents the permission level you would like this user to have.
vi. To designate which office(s) will be available to a particular user, select the user from the Users list, then check the appropriate offices under the User Offices heading.
vii. You may save your changes at any time in the process by clicking the Save button.
viii. To save your changes and exit the Administrator Panel in one click, click the Save and Exit button.
8.Manage Windows Users:

a.Setting Permissions:
i.Permissions can be assigned to a user or group by using the Add Principal button to select the user or group principal.
ii.User or group principal names can be edited through the Principal Name textbox.
iii.To set the permissions for the user or group, select the entry in the User/Group Principals list, then check the box in the User/Group Type list for the appropriate permissions. See Manage Permissions above for information on the permission types.
iv.To designate which office(s) will be available to a user or group, select the entry from the User/Group Principals list, then check the appropriate offices under the User/Group Offices heading.
v.You may save your changes at any time by clicking the Save Principal button.
vi.To save your changes and exit the Administrator Panel in one click, click the Save and Exit button.
b.Effective User permissions:
i.Users can be given permission directly or through membership in a group.
ii.Any permissions granted to a user or groups they belong to are added together.
iii.For example, if a user belongs to a group with “User” permissions and also a group with “Administrator” permissions, they will be able to do anything that a User or Administrator can do and access any offices that either group can access.
c.Managing Users:
i.Users who have been assigned permissions directly or have logged into Intelicode will appear in the Known Users list.
ii.The Auto-Name User option will allow users’ names to automatically update on login if the user is connected to a domain controller.
iii.A user’s name can be changed by selecting a user, then editing the name fields.
iv.Click Save User Name to save changes to a user. Note that users’ names may be changed automatically if the Auto-Name User option is left enabled.
v.Users may be deleted from the Known Users list by right-clicking on the name and selecting Delete User.
1.This does not remove the user’s permissions. Permissions must be removed by removing the user from groups that have permissions or by removing or editing permissions for the user or group.
2.Users cannot be deleted if they have been granted permission directly rather than through a group. Right-clicking on these users will show a Select Principal option to allow quick access to the user’s permissions.
d.Removing Permissions:
i.Permissions can be granted to a user directly or through membership in a group.
ii.If permission was granted directly, permissions can be removed by selecting the entry in the User/Group Principals list, then unchecking the checked items in the User/Group Type list and User/Group Offices list and then clicking Save Principal.
iii.Permissions may also be removed by selecting the entry in the User/Group Principals list, then clicking Delete Principal.
iv.If permission was granted to a user through membership in a group, their permissions can be removed by either removing them from the group or removing permissions from the whole group.
9.Audit Trail:
a.Purpose:
i.The Audit Log within Intelicode® was created to keep an audit trail of changes made to audits and other data. The Audit Log tracks many different events within Intelicode®. These events include creating, editing, and deleting data, viewing data simply by opening Visit Summaries, printing a report, or opening audits into the patient screen, and even user login information such as when a user logs in, fails to log in, changes a password, and more. Additionally, the Audit Log adds some security in which Intelicode monitors the data and shows indicators in the Audit Log if suspicious activity in the logs is detected. This includes logs being deleted or edited outside of Intelicode itself.
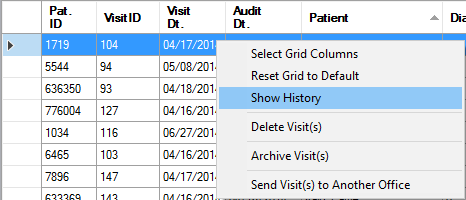
b.Opening the Audit Log:
i.You can open it through Visit Summaries by right-clicking on a visit and choosing “Show History”
*note that this item is only available if the currently logged-in user’s User Group has permission to view visit history. To check this, look under Mange Users and Manage Permissions in the Administrator Panel.
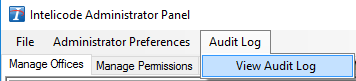
ii.You can also choose the menu item "View Audit Log" from within the Administrator Panel.
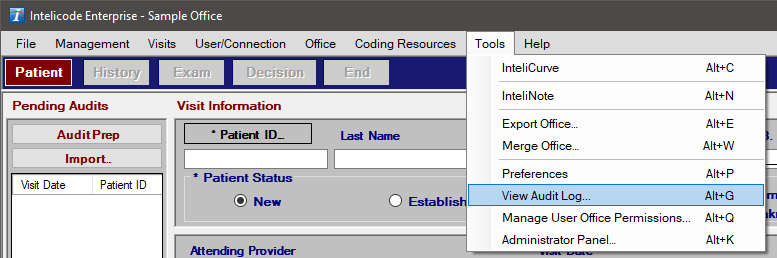
iii.If your user has the “View the Audit Log” permission, they may open the log through the Tools menu on the main screen.
c.Viewing the Audit Log:
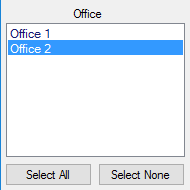
i.The log is organized into different sections. For changes that occur within a specific office, such as creating or editing an audit, logs can be found under the section with that office’s name. If the section does not appear, be sure the office name is selected in the Office list on the left panel of the Audit Log.
ii.Higher-level changes are shown under sections that are less specific. For example, creating an office or changing an office name will show up under “Offices.” Changes that happen to data that is not specific to any particular office will show up under headings such as Offices, Admin, User, and Login.
iii.The Audit Log allows the user to filter by date range of when the change occurred and filter by office(s), actions, and more. This functionality should look and feel similar to that of Visit Summaries.
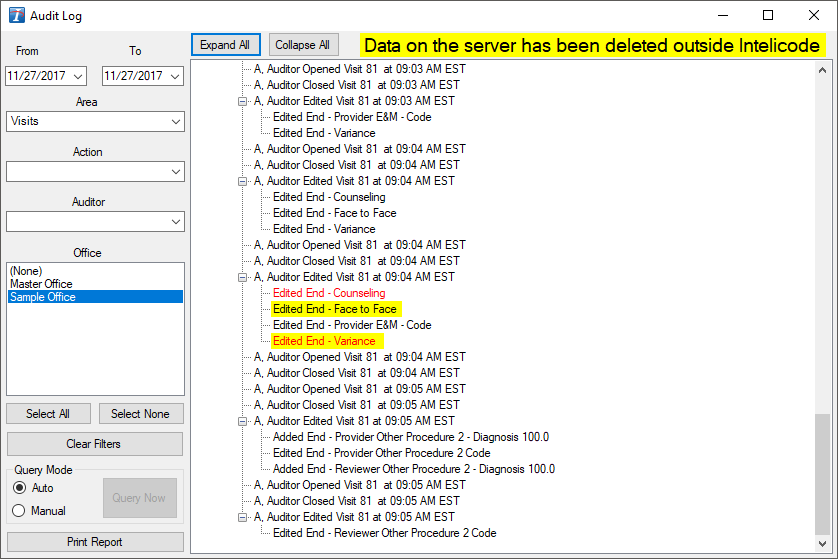
iv.The audit log implements security measures to detect changes in the log data. Logs that have been deleted from the server will be highlighted in yellow. Logs that have been modified appear with red text. If either of these indicators appear, it is advised that the Administrator takes additional measures to find the source of a possible breach. Intelicode does not assume responsibility for the security of the database.
d.What does Intelicode Log?:
i.The following is a quick list of actions that Intelicode logs. The Audit Log is not limited to the listed items and may show logs for more than just what is listed in different circumstances.
ii.Logs are added when a user performs the following actions:
▪Data Creation
•Visits
•Management Data
•Reviewers
•Offices
▪Data Deletion
•Visits
•Management Data
•Reviewers
•Offices
▪Data Changes
•Visits
•Offices
•Management Data
•Reviewers
•Administrative Settings
▪Data Importing
•Management Data
•Offices
•Reviewers
▪Data Exporting
•Management Data
•Offices
•Reviewers
▪Data Merging
•Management Data
•Offices
•Visits
•Reviewers
▪Data Viewing
•Reports
•Visits
▪Data Transferring Between Offices
•Visits
•Management Data
iii.For ease of determining which audit the information is about, a new column is now visible in Visit Summaries. Visit ID is consistent within a single office and can be used to identify a visit. It is important to recognize that sending a visit to another office will result in a unique visit ID in that other office which can be used to determine which visit is which.
Note: Changing your date format in the Date & time section of the Windows Control Panel will break the checksum on the Audit Log as the dates will no longer match. This will make it appear as though the database has been tampered with. If the Audit Log is critical for your usage of Intelicode then it is recommended not to change the system date format.
Copyright © 1998-2026 Technology Solutions, Inc. All rights reserved.
INTELICODE® is a registered trademark of Technology Solutions, Inc. (TSI). All Rights Reserved.